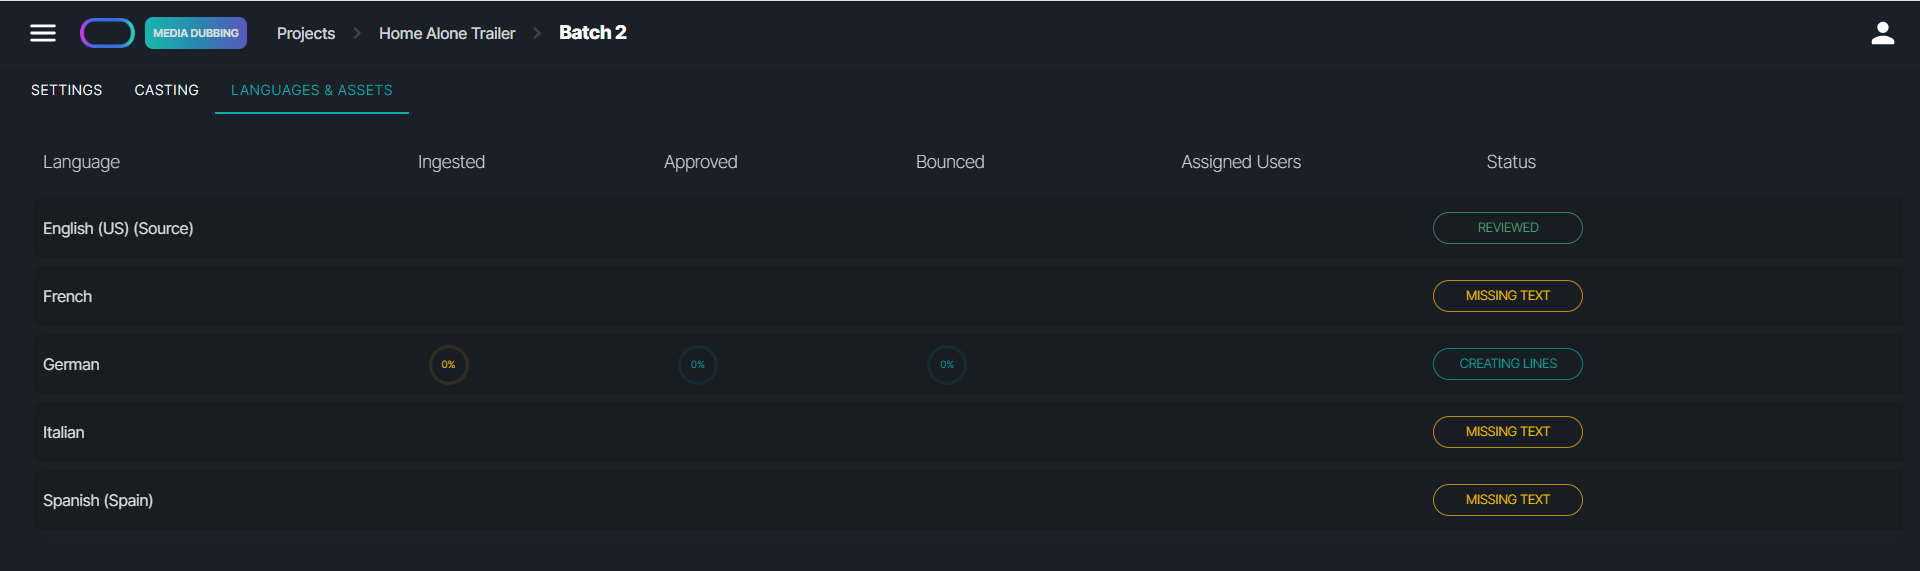
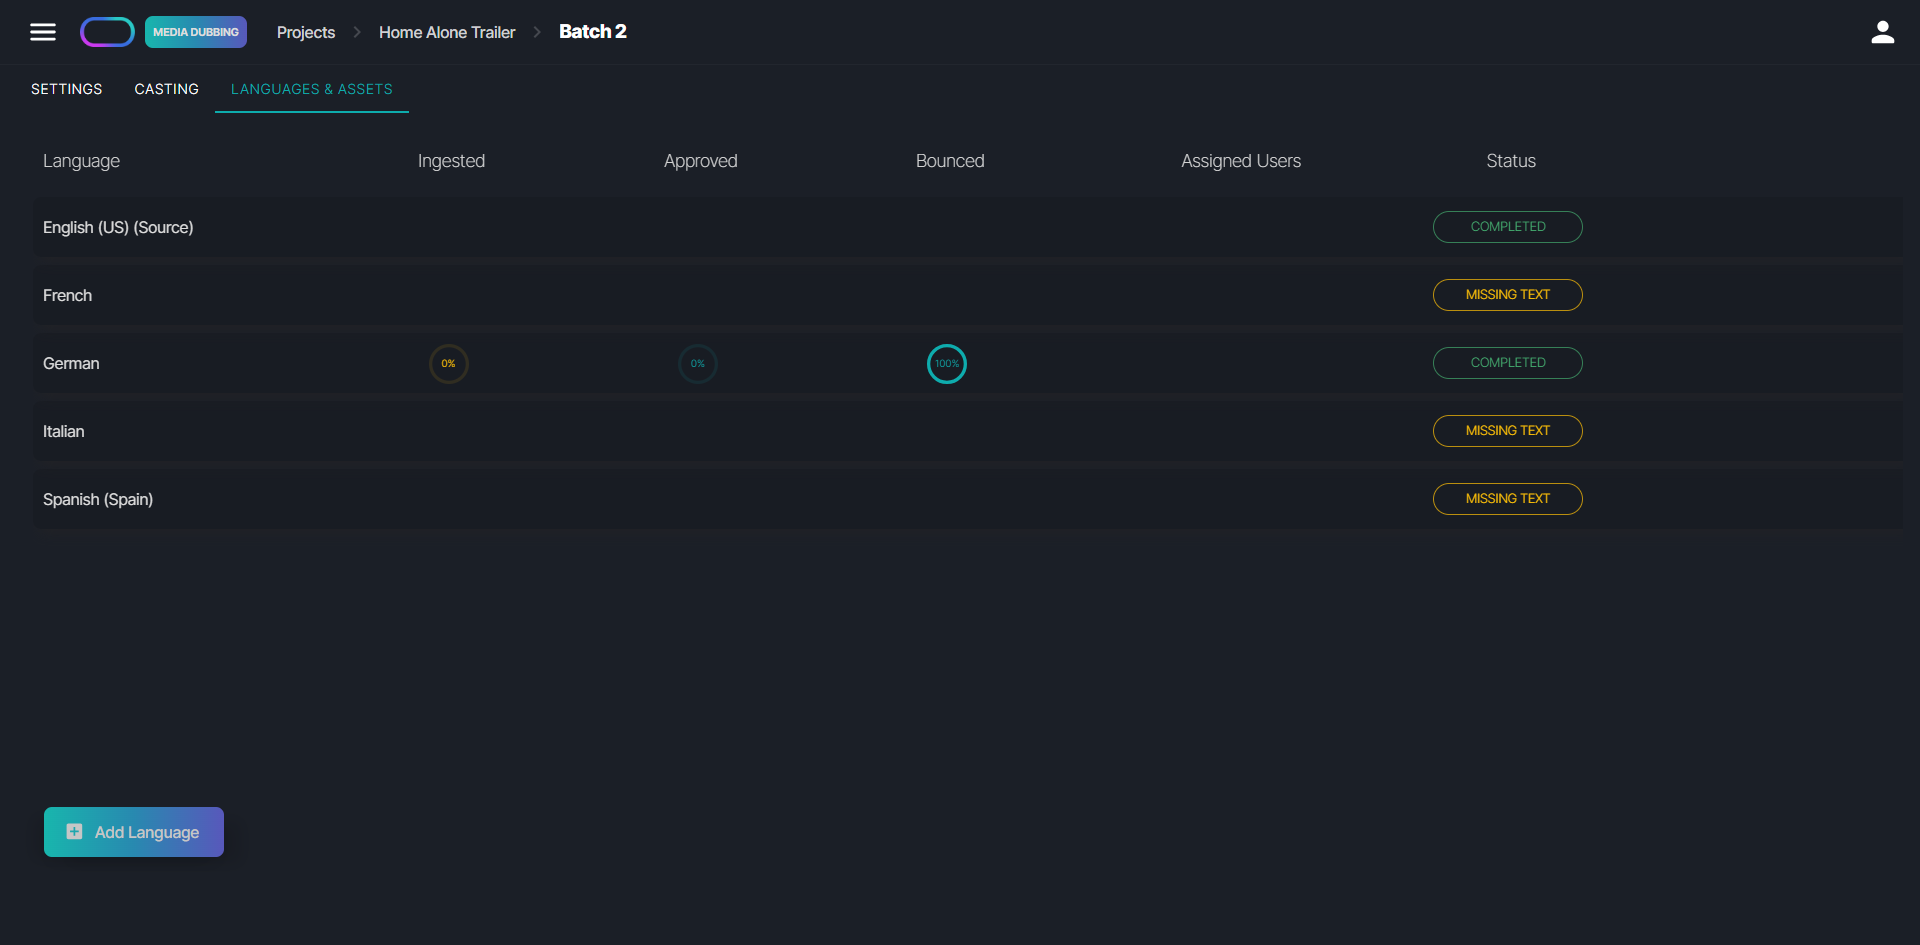
Languages & Assets
The Languages & Assets tab serves as the central hub for project management within the platform. Here you can prepare each language for review, assign linguists, and manage your media assets.
Source Language
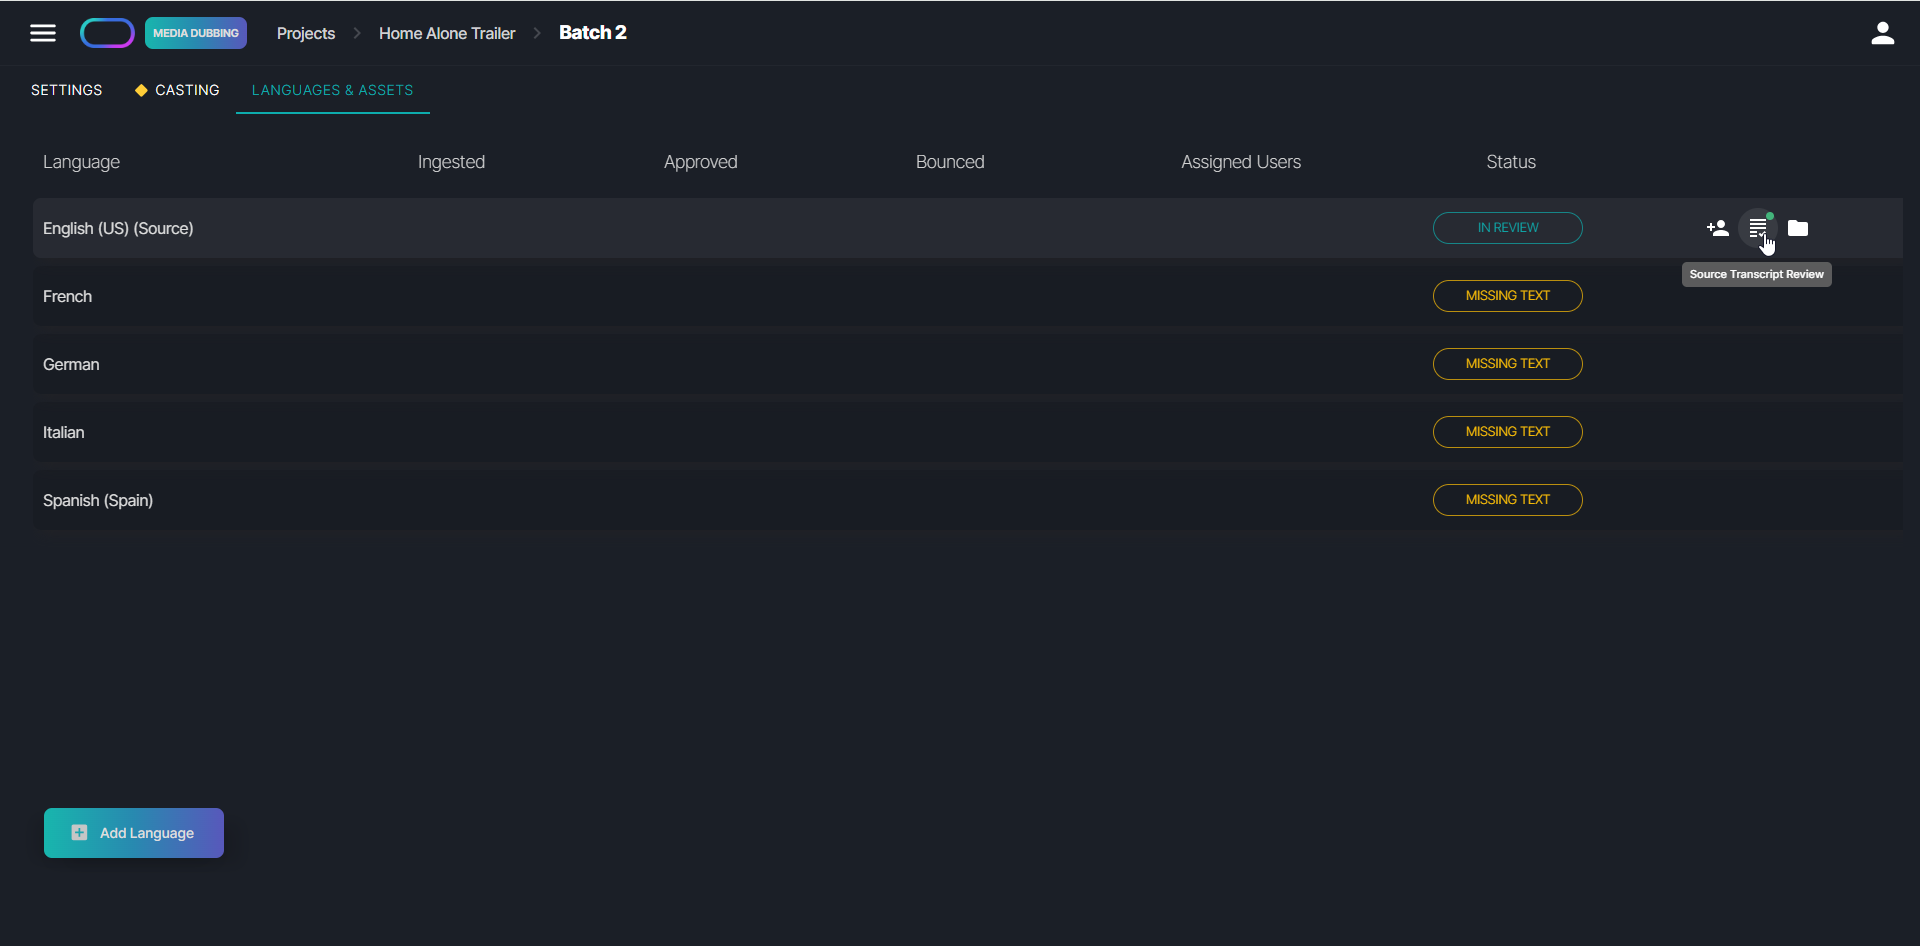
Source languages are available in both Media Dubbing and Line Dubbing projects. In Line Dubbing projects, they serve primarily as an access point for reviewing the source audio. In Media Dubbing projects, however, source languages play a more critical role. Here you can assign linguists to review the source script and access the transcribed or uploaded lines. This step must be completed before uploading target language scripts or initiating machine translation.
Target Languages
For target languages, you can view the status and progress statistics, with each status providing guidance on the next steps to move the process forward.
1. Missing Text
Missing Text indicates that you need to either upload a target language script or perform machine translation of the source script. Target language scripts are required before the system can generate lines and speech. To upload a script, hover over the line and click the Upload Assets icon. To machine translate a source script, hover over the line and click the Machine Translate icon.
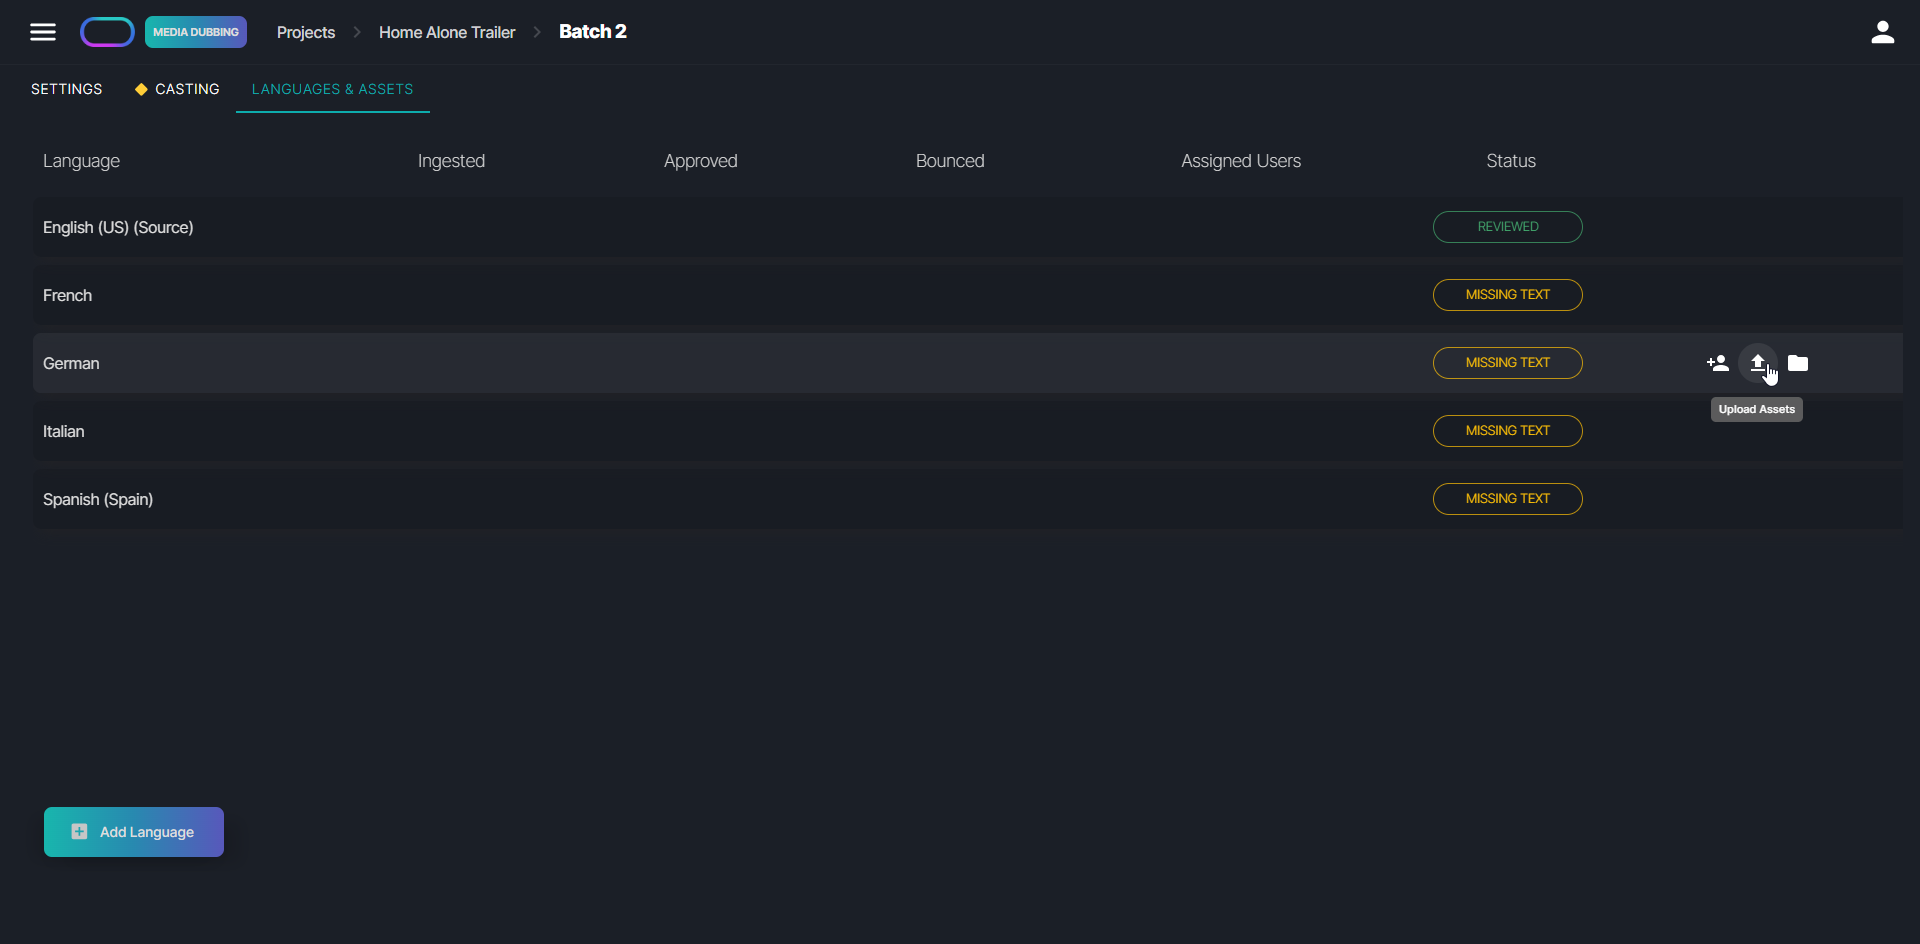
To machine translate a source script, hover over the line and click the Machine Translate icon. A modal will open to select your provider and apply additional settings such as formality or dictionaries.

If you don't see the icon, please enable a machine translation system on your platform.
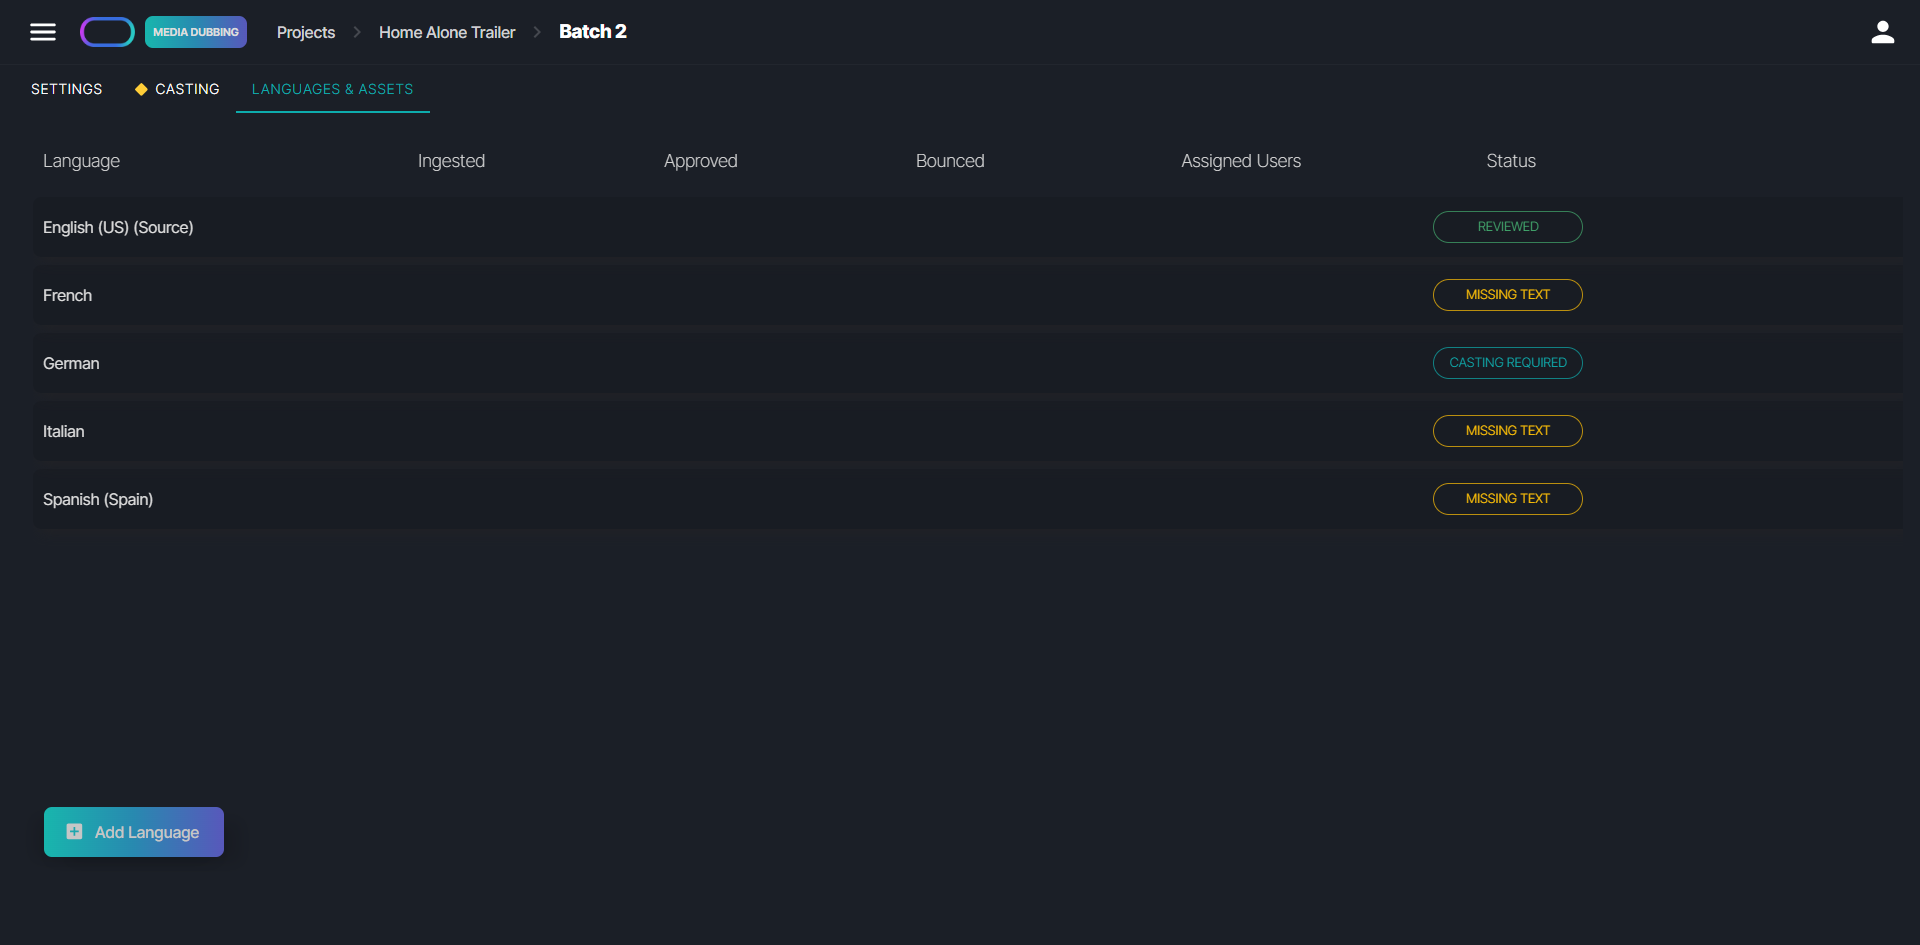
2. Casting required
This status appears if no voices have been assigned to your characters. To assign voices, navigate to the Casting tab of the batch and identify characters without voice assignments.
3. Creating Lines
The status Creating Lines indicates that the system is generating speech and processing your request. During this time, actions on this language are restricted until the line creation and speech generation are complete. Depending on the length and complexity of your media file, this process may take some time.
4. Active
Once speech has been generated, the language status changes to Active. You can now open the Preview Editor to review the audio. The line also displays the number of lines that have been Ingested, Approved, and Bounced, so you can track your progress.

You can assign a linguist to review audio content for the language by hovering over the line and clicking the Assign User icon. Note that a user can only be assigned if they are already a member of the project team. Once assigned, the reviewer will be given access to the Preview Editor to begin their work.

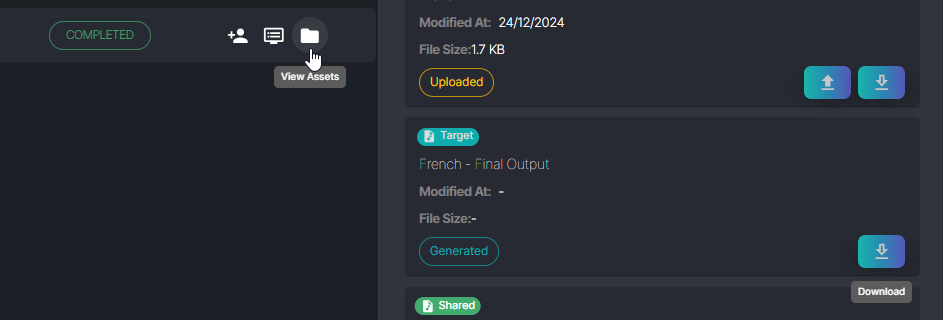
5. Completed
When all the lines have been bounced, the workflow status updates to Completed. This indicates that the audio files for the language have been verified and are ready to be exported. To export individual lines, navigate to the editor view, go to the Bounced tab, and download the audio files through the action menu.
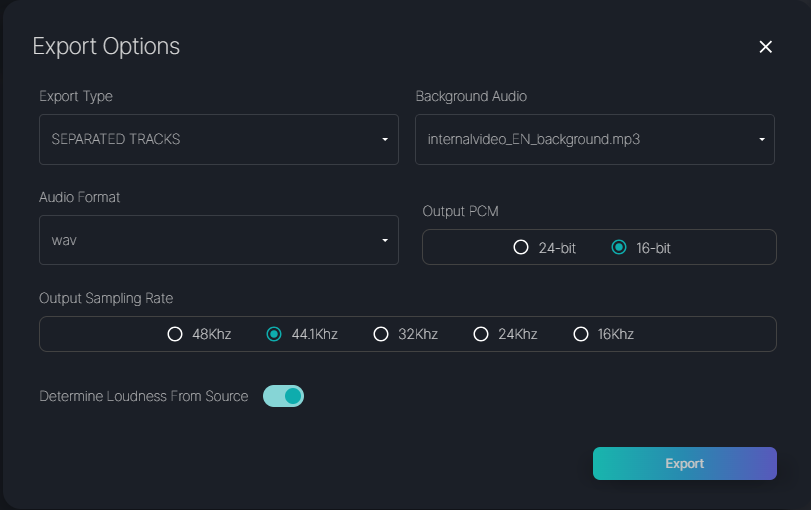
For more advanced download options, open the Asset Management for a language. In the Final Output section, click the download icon to access the export modal.
- Mixed Video: Exports a video file with mixed background audio and voice tracks.
- Mixed Audio: Exports an audio file with mixed background audio and voice tracks.
- Separated Tracks: Exports background and voice tracks as separate audio files.
- Separated Tracks by Speaker: Exports one audio file for each speaker's voice track.
- Stems: Exports one audio file for each chunk of audio.
- All: Exports all of the above options
In addition to selecting the export type, users can customize their export settings by selecting a background audio file, the output format (WAV, MP3, or MP4), the output bitrate or PCM, and the output sampling rate.