Settings
Once you've created a batch, you'll be taken to the Settings screen, where you can customize how you manage ingested assets and select automated processes. Different options may be available depending on the project type. Below is a breakdown of available settings:
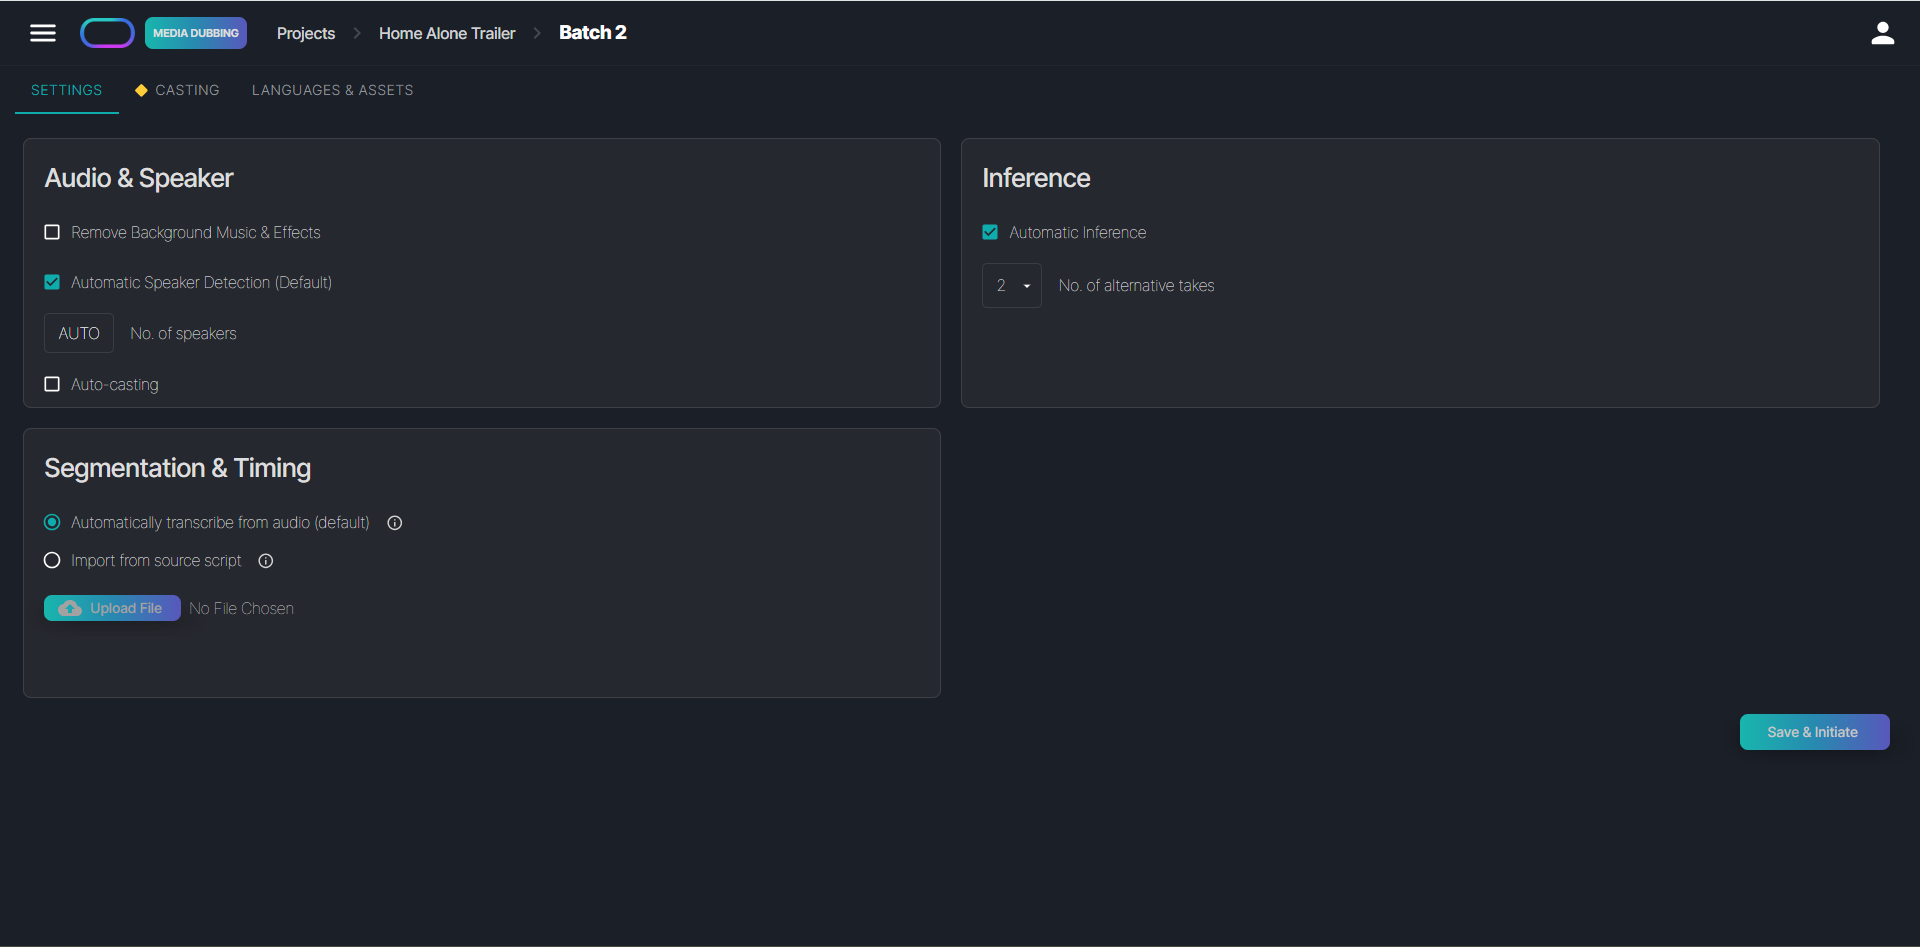
1. Audio & Speakers
In this section you'll find settings related to the source audio:
Remove Background Music & Effects
This option removes background music and effects from the source track and saves them as a separate audio file in the Asset Management folder. You can use this track later in the Timeline. Note that while the system attempts to isolate these elements, the extracted audio may not be as clean as an original background music file.
Automatic Speaker Detection
Toggle this setting to automatically detect the number of speakers in the audio. When selected, the system analyzes the audio and identifies the speakers. If deselected, you can manually enter the number of speakers.
Auto-Casting
Auto-Casting analyzes the voices in the source audio and assigns each detected character the most similar match from the Voiseed library, helping to streamline the casting process.
2. Inference
Here, you can choose whether the system should automatically generate audio lines once a language setup is complete.
Automatic Inference
Enabling this option allows the system to automatically generate audio lines after a language has been prepared. You can also specify how many alternative takes to create (up to 2). While generating multiple takes may increase the preparation time, it gives linguists more takes to choose from.
3. Segmentation & Timing
This section defines how to set up text segmentation and timing.
Automatically Transcribe from Audio
When selected, the system detects speech in the audio file and automatically creates segments with accurate timing.
Import from Source Script
This option allows the system to import timing and segmentation from an uploaded source language script. It is only available for .srt, .ttml and .vtt file formats. For .srt files, you can also specify a speaker separator to identify character names. For example, if a line in the .srt file is written as "Speaker 1: This is my line." and you specify the colon as the separator, the system will import "Speaker 1" as the character and "This is my line." as the text.
After selecting all relevant settings, click "Save & Initiate" to begin the asset ingestion process. Please note that this process may take some time depending on the settings you have selected. Once complete, you will be taken to the Casting tab for this batch, which is similar to the Casting tab at the project level. From there, you can proceed to the Languages & Assets screen - your main workspace for managing this batch and its languages.